Network Attached Storage (NAS) is becoming an increasingly popular way to store and access data for both home and business use. Instead of relying on traditional external hard drives or cloud storage services, NAS devices offer users greater control and security over their data by providing a dedicated storage system that can be accessed through a network connection. In this article, we will explore the various types of NAS devices available on the market, help you choose the right one for your needs, and provide a step-by-step guide on how to set up your NAS device. Additionally, we will highlight some advanced settings and features you can use to maximize the benefits of your NAS device. Let’s dive into the world of NAS and take your data storage to the next level.
What is network attached storage and why should you use it?
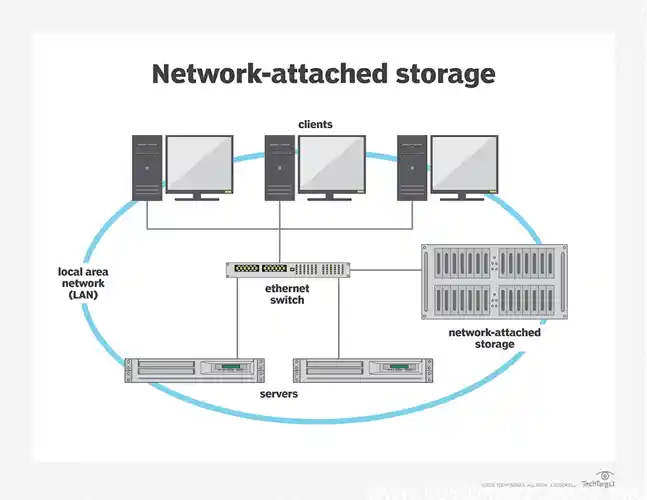
Have you ever wished for a centralized place to store and access your files from multiple devices? That’s where network attached storage (NAS) comes in. NAS is a type of device that connects to your home or office network and provides storage space that can be accessed by any device connected to that network. This can include laptops, smartphones, tablets, and even gaming consoles. But NAS isn’t just about convenience – it also provides added security by allowing you to keep all your important files in one secure location, rather than having them scattered across different devices. Additionally, NAS often allows for more robust data backup and recovery options than other storage solutions. If you’re looking for a flexible and secure way to store your data, then setting up a network attached storage device may be the solution you’re looking for.
Understanding the different types of NAS devices available in the market
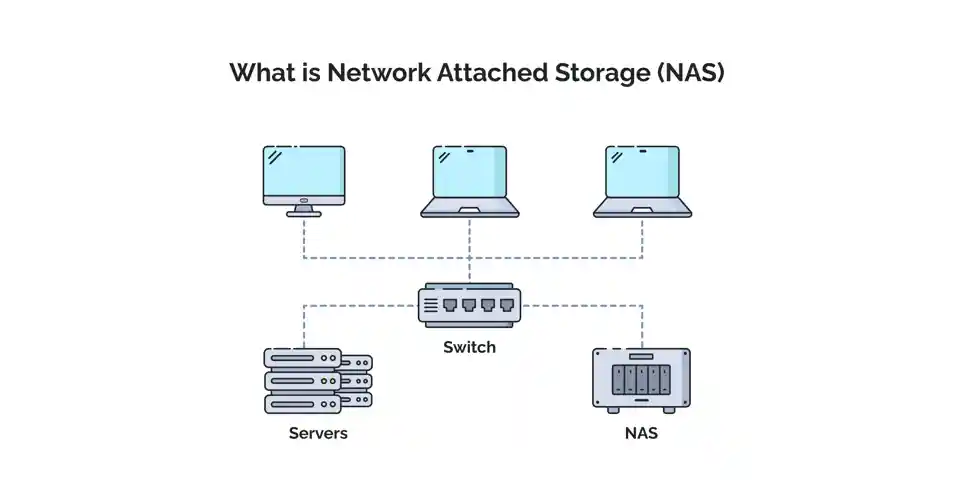
When it comes to network attached storage, there are a plethora of options available on the market. One of the first decisions you’ll have to make is whether you want a Windows NAS or a Synology NAS. Both have their own unique strengths, but a Windows NAS may be preferable if you’re already using a lot of Microsoft products. On the other hand, a Synology NAS offers greater versatility and customizability, and is ideal if you plan on using a variety of devices (such as Macs) in your setup. Another consideration is whether to opt for a cloud-based NAS or a local NAS device. A cloud NAS provides off-site storage, which is great for backing up important data and allows you to access your files from anywhere. However, local NAS devices are faster and more secure as they are not reliant on an internet connection. Ultimately, it comes down to your individual needs and priorities.
Comparing Windows NAS and Synology NAS
Network attached storage (NAS) devices have gained significant popularity among individuals and businesses in recent times. With a plethora of options available in the market, choosing the right device can be overwhelming. Synology and Windows are among the most popular options when it comes to NAS devices. While Windows NAS offers easy integration with Microsoft applications, Synology offers a user-friendly interface with excellent features for backup, multimedia management, and cloud support. Additionally, you must consider whether to opt for cloud-based or local NAS devices. While local NAS devices offer the flexibility to access your files even without an internet connection, cloud-based devices provide easier remote access and increased scalability. Ultimately, choosing the right device for your needs will depend on the size of your business or home and your storage needs.
Differences between Cloud NAS and local NAS devices
When it comes to network attached storage, or NAS, there are a variety of options to choose from. Two popular choices are Windows NAS and Synology NAS. Windows NAS devices are typically cheaper and easier to set up, making them a great choice for beginners. Synology NAS, on the other hand, has more advanced features and is generally more reliable. Another type of NAS device is Cloud NAS, which stores your data on a remote server rather than on a local device. While this can be convenient, it may come with added costs and may not be as secure as a local NAS device. When choosing a NAS device, consider factors such as how much storage you need, how many users will be accessing it, and what types of files you will be storing. It’s also important to choose a device with enough processing power and memory to handle your needs. By doing your research and weighing your options, you can find the right NAS device to meet your needs and keep your data secure.
How to choose the right NAS device for your needs?
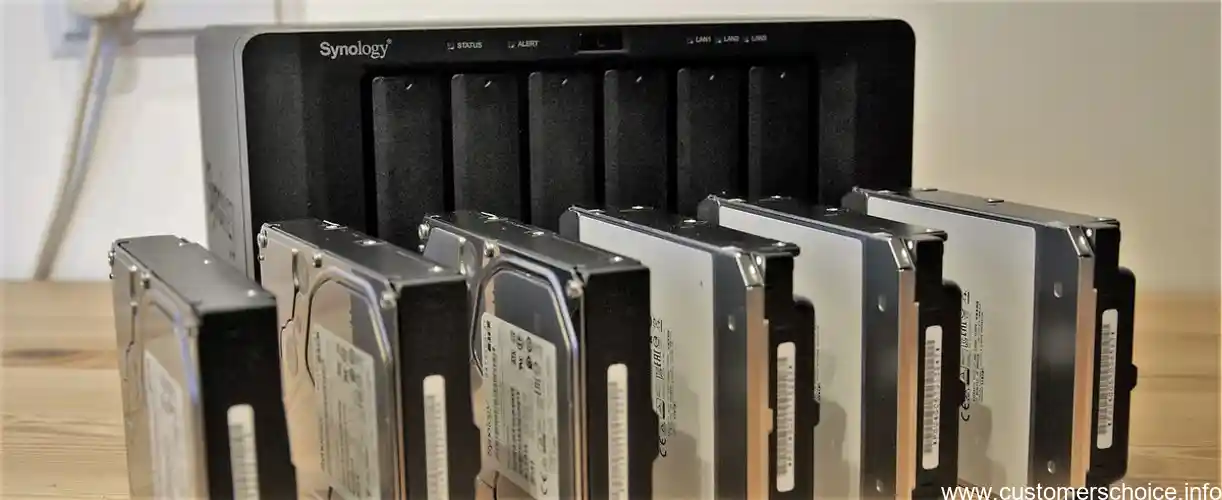
When it comes to choosing the right network attached storage (NAS) device for your needs, there are a number of factors to consider. First and foremost, you’ll want to think about the amount of storage space you need and how many hard drives you’ll require. It’s also important to consider the level of processing power and memory you need in order to ensure that your device can keep up with your data requirements. Additionally, you’ll want to think about connectivity options, such as USB 3.0 and Ethernet, and whether you need the ability to add on extra features, such as Docker or CCTV. Finally, it’s important to consider your budget, as NAS devices can vary widely in price depending on their specifications and features. Taking the time to carefully assess your needs and research your options can help you find the perfect NAS device for your home or business.
Factors to consider while choosing a NAS device
Choosing the right network attached storage (NAS) device depends on several factors. Firstly, you need to identify the purpose of the NAS. Is it for home or business use? Are you planning to store large media files or important documents? Consider the number of users who will access the NAS and how much storage capacity you need. You should also think about the types of drives that you’ll need (HDD or SSD), as well as their speed, capacity, and reliability.
Secondly, take a look at the connectivity options available with the NAS device. Ethernet is a must-have for networking, but you may also want to look for other options like USB or Thunderbolt ports for direct data transfer. For home use, you may want to consider NAS devices that offer cloud backup support or integrated wireless connectivity for seamless media streaming across multiple devices.
Lastly, choose a device with a user-friendly interface and helpful features. Many popular brands like Synology, Netgear, and Western Digital offer proprietary software that makes NAS setup and management a breeze. Synology’s DiskStation Manager (DSM), for example, has features like app downloads, centralized user management, and real-time video surveillance that help make it one of the top-rated NAS devices. Whatever your needs may be, make sure to do plenty of research before making your purchase to ensure you’re getting the right NAS device for you.
Top 5 recommended NAS devices for home and business use
When choosing the right NAS device for your needs, there are several factors to consider. First and foremost, determine how you will use the NAS – for personal or business use, or both? Then, consider the storage capacity you need and how many bays the device should have. Additionally, consider whether you need certain features like built-in backup capabilities, RAID support, or the ability to connect multiple users. Some popular NAS devices for home and business use include Synology DiskStation, Netgear ReadyNAS, and QNAP TS-x51 series. Whatever you choose, be sure to also consider the user-friendliness of the device and whether the accompanying software is easy to navigate and use. In the end, finding the right NAS device is about finding the perfect balance between performance, affordability, and features.
Step by step guide to setting up your network attached storage
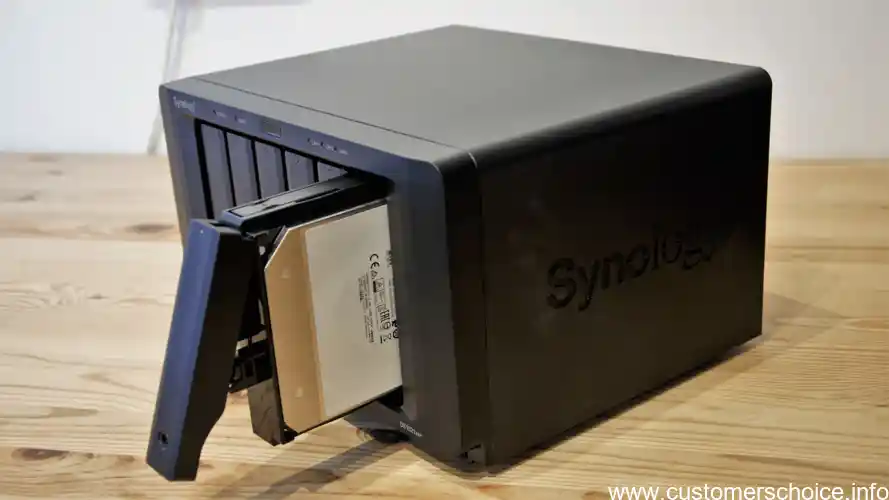
Setting up a Network Attached Storage (NAS) device can seem like a daunting task, but with the right guidance, it can be a breeze. To start, you need to connect your NAS device to the network. Depending on the type of device you choose, you may have one or more Ethernet ports to connect. After connecting, you’ll need to set up Domain Name System (DNS) and Dynamic Host Configuration Protocol (DHCP) to ensure your NAS can communicate properly with your network. Next, configuring Server Message Block (SMB) or File Transfer Protocol (FTP) will allow file sharing across your network. Data protection is crucial, so it’s recommended to set up a redundant array of independent disks (RAID) and backup procedures for peace of mind. With these steps in place, your NAS is ready to provide centralized storage and other features for your home or business network.
Connecting your NAS device to the network
If you’re looking to set up network attached storage (NAS) for your home or business, there are a few key steps you’ll need to follow. First, you’ll need to connect your NAS device to your network. This can be done using a variety of methods, including Ethernet, WiFi, or USB. Once your NAS device is connected to your network, you’ll need to configure it for use. This may involve setting up DNS and DHCP, configuring SMB and FTP for file sharing, and setting up RAID and backup for data protection. Once your NAS device is up and running, you’ll be able to access your files from any device connected to your network. Whether you’re storing data for personal use or running a business, setting up a NAS device can be an effective way to ensure that your data is secure and easily accessible.
Setting up DNS and DHCP
Setting up a network attached storage (NAS) may seem daunting, but it doesn’t have to be. Here is a step by step guide to get you up and running in no time. Firstly, connect your NAS device to your local area network (LAN). Most NAS devices support Ethernet connectivity, and you will need at least one Ethernet port on your device to get started. Once you have connected your device, you will need to set up Domain Name System (DNS) and Dynamic Host Configuration Protocol (DHCP) for internet connectivity.
Next, configure your NAS for file sharing using either Server Message Block (SMB) or File Transfer Protocol (FTP). Windows NAS devices typically use SMB for file sharing, while Synology NAS devices use SMB and FTP. Ensure that you set up RAID for data protection, which typically involves choosing the RAID level and the number of disks. NAS devices generally support different types of RAID levels, including RAID 0, RAID 1, RAID 5, and RAID 10.
Lastly, back up your data to ensure data protection. NAS devices come with built-in backup software that makes it easy to schedule backups or select files to back up. Alternatively, you can opt for a cloud backup service for additional data redundancy. With these simple steps, you will have set up your NAS device and ready to start backing up, sharing, and storing your data efficiently and safely.
Configuring SMB and FTP for file sharing
If you want to set up a network attached storage device for your home or business, it’s important to choose the right NAS device and understand how to configure it properly. The first step is connecting your NAS device to the network and configuring DHCP and DNS settings. Once your NAS is connected, you can configure SMB and FTP protocols to enable file sharing across multiple devices and users. Setting up RAID and backup protocols is also important to protect your data and prevent loss or corruption. Depending on your needs and budget, you can choose from a wide range of NAS devices from companies like Synology and Windows. Keep in mind important factors like capacity, speed, and connectivity when choosing a device. Don’t forget to read reviews and compare models to find the right device for your needs. With a little effort and planning, you can set up a reliable and efficient NAS device to improve your file management and data protection.
Setting up RAID and backup for data protection
So, you’ve decided to dive into the world of network attached storage (NAS) devices. But how do you set it up? Don’t worry, it’s not as complicated as it might seem. The first step is to connect your NAS device to the network. Most NAS devices come with an ethernet port that you can use to connect it to your router or switch. Once your device is connected to the network, you can access the web-based management interface of the NAS through its IP address.
Next, you will want to set up DNS and DHCP. DNS will allow your device to access the internet, and DHCP will allow you to configure network settings on the device automatically. For file sharing, you’ll need to configure SMB and FTP protocols on the device. Once that is done, it’s a good idea to set up RAID for data protection. RAID can also improve the overall performance of your device.
NAS devices come in different sizes and capabilities, and the features they offer vary as well. When choosing a device, consider your specific needs. Factors to consider include the number of drives you need, the size of the device, the processor and memory it uses, and its operating system. Once you’ve narrowed down your options, consult our list of the top 5 recommended NAS devices for home and business use.
Setting up your own NAS might take a little time, but it can be well worth it for the flexibility and customization it offers. And don’t forget about the advanced settings and features you can utilize, like Docker and virtualization, CCTV and surveillance, and remote access. With the right device and a little bit of knowledge, you’ll be up and running in no time.
Advanced NAS settings and features you need to know
If you’re an experienced NAS user looking to maximize the potential of your device, there are some advanced settings and features you should know about. One such feature is using Docker and virtualization on your NAS device, which can allow you to run various apps and services without having to constantly switch between different devices. Additionally, configuring remote access to your NAS device can allow you to access your data from anywhere, making it a convenient option for busy professionals or those on the go. Lastly, setting up CCTV and surveillance with your NAS device can add an extra layer of security to your home or business, allowing you to keep an eye on your surroundings with ease. By utilizing these advanced settings and features, you can get the most out of your NAS device and ensure that your data is always secure and accessible.
Using Docker and virtualization on your NAS device
Network Attached Storage (NAS) is more than just a storage device that lets you save your important data. It has advanced settings and features that can streamline your digital life. Once you set up your NAS, you can easily use Docker and virtualization features for efficient application management, no matter if you have a Windows NAS or Synology NAS. With remote access features, you can access your data from anywhere in the world and configure CCTV surveillance systems with your NAS device. However, choosing the right NAS device can be tricky, especially when there are so many factors to consider like storage capacity, memory, processing speed, connectivity options, and budget. So, before you make a purchase decision, be sure to research and compare the top 5 recommended NAS devices for your home or business use. Also, make sure you have configured your DNS and DHCP servers and have set up the correct file-sharing protocols like SMB and FTP for data backup. Don’t forget to use RAID and backup settings for your data protection to safeguard against hardware failure or malware attacks. Whether you have Macs, Windows 10, or Raspberry Pi, you can easily integrate your device with NAS storage using either USB 3.0 or Ethernet connectivity options.
Configuring remote access to your NAS device
When it comes to setting up network attached storage, there are a variety of advanced settings and features to explore that can greatly enhance the functionality of your NAS device. One popular option is utilizing Docker and virtualization, allowing you to run applications and services within a container on your NAS. Additionally, configuring remote access to your NAS device can be a convenient way to access your data from anywhere. This can be done through a VPN connection or utilizing the Cloudflare DNS service. Another feature to consider is setting up CCTV and surveillance with your NAS device, turning it into a centralized monitoring system for your home or business. Regardless of the features you choose to utilize, it’s important to take the necessary steps to properly secure your NAS, such as enabling 2-factor authentication and configuring your firewall settings. With the right advanced settings and features, your NAS device can become a powerful and versatile tool for all your data storage and management needs.
How to set up CCTV and surveillance with your NAS device
Are you ready to take your network attached storage (NAS) to the next level? Let’s explore some advanced settings and features you need to know. First, consider using Docker and virtualization on your NAS device for increased versatility and functionality. With the ability to run different applications and operating systems in isolated containers, you can do more than ever before with your NAS. Additionally, remote access to your NAS device is critical for seamless use. Configure your NAS to be accessible from outside your LAN, either through an official app or third-party solutions, to take full advantage of all your data, no matter where you are. And don’t forget about setting up CCTV and surveillance with your NAS device to add an extra level of security to your home or business. With these advanced settings and features, your NAS can truly reach its full potential.
Q1. What is Network Attached Storage (NAS)?
Ans: NAS is a storage device that connects to a network, allowing multiple users to store, share and access their data.
Q2. How do I set up a NAS device?
Ans: You need to connect the NAS device to the network, configure the settings via the web-based interface, and set up user permissions for data access.
Q3. Can I access my NAS device remotely?
Ans: Yes, most NAS devices offer remote access via the internet, but you need to set up a secure connection and configure the relevant settings.
Q4. Can I expand the storage capacity of my NAS device?
Ans: Yes, most NAS devices offer the ability to add more hard drives or use external storage devices for increased storage capacity.

